
Create a website with GitHub & jekyll in 2023
If you have a GitHub account, you can create a static website using the GitHub Pages feature. In this post I will guide you on how to create a website for yourself that you can use to showcase your work or if you like blogging, you will be able to do that as well using jekyll themes. This tutorial is geared towards MacOS users but the steps will be similar for Windows/Linux users. We will be using the Chirpy theme for our website, although you can also use any theme you like. Check out jekyllthemes.io or jekyllthemes.org for more options.
Install Ruby on your system.
You can check if you have Ruby installed already by running the following command in the terminal.
Mac-mini:Blog anupdsouza$ ruby -v
In my case, since I’m using a mid 2012 Mac mini, I had an incompatible version of Ruby installed.
Mac-mini:Blog anupdsouza$ ruby -v
ruby 2.3.7p456 (2018-03-28 revision 63024) [universal.x86_64-darwin17]
Since Jekyll requires a minimum Ruby version of 2.5.0, lets install an appropriate version. If you dont have Ruby installed I recommend using a Ruby package manager such as rbenv. I’m using Homebrew to install rbenv
Mac-mini:Blog anupdsouza$ brew install rbenv ruby-build
Run the following command to list the available stable Ruby versions.
Mac-mini:Blog anupdsouza$ rbenv install -l
2.7.7
3.0.5
3.1.3
3.2.1
jruby-9.4.2.0
mruby-3.2.0
picoruby-3.0.0
truffleruby-22.3.1
truffleruby+graalvm-22.3.1

Only latest stable releases for each Ruby implementation are shown.
Use 'rbenv install --list-all / -L' to show all local versions.
Since I am working on a mid-2012 Mac Mini running High Sierra, I decided to go with a slightly older release of Ruby v2.6.0. You should be able to install the latest stable release of Ruby without any issues.
Mac-mini:Blog anupdsouza$ rbenv install 2.6.0
Once installed, you can activate that version of Ruby as the default Ruby version on your machine.
Mac-mini:Blog anupdsouza$ rbenv global 2.6.0
Mac-mini:Blog anupdsouza$ rbenv version
2.6.0 (set by /Users/anupdsouza/.rbenv/version)
Kill terminal & restart. Check the installed Ruby version & you should see the version of Ruby you installed.
Mac-mini:Blog anupdsouza$ ruby -v
If you see any other(older) version of ruby, check your ~/.bash_profile file that it contains the following, if not then add the following to your ~/.bash_profile.
export PATH="$HOME/.rbenv/bin:$PATH"
eval "$(rbenv init -)"
Kill terminal & restart & check ruby version again to verify.
Setting up Chirpy
Next, head to the Chirpy GitHub repository & select the Use this template > Create a new repository option.
 On the next page for the repository name, enter it in exactly the following format:
[your github username].github.io
Make sure repository visibility is Public, then select Create repository from template.
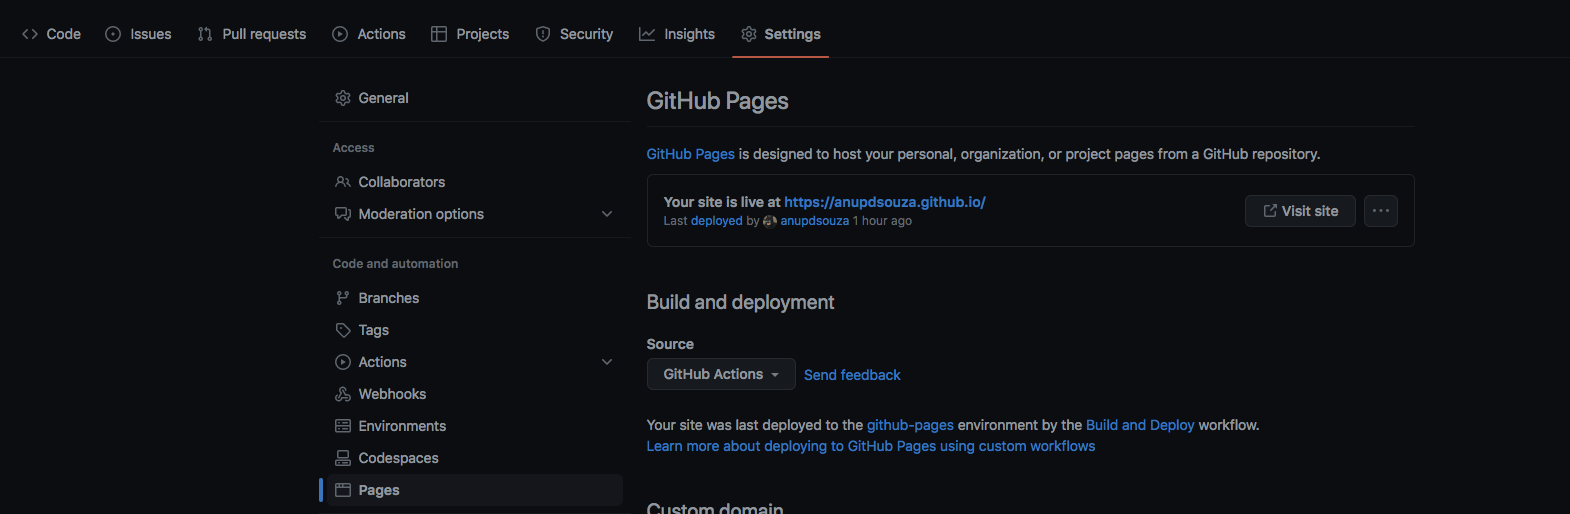
Once your repository has been created, head over to Settings > [Code and automation] Pages > [Build and deployment] Source > select GitHub Actions
 Clone the repository to your system & cd to the folder you cloned it to in terminal & enter the following commands to install dependencies:
Mac-mini:anupdsouza.github.io anupdsouza$ gem install bundler
Mac-mini:anupdsouza.github.io anupdsouza$ bundle
Open the cloned folder in your IDE of chouce & open the _config.yml file. This file contains all the site configuration for your jekyll website. Customise the following fields to get started:
# The language of the webpage › http://www.lingoes.net/en/translator/langcode.htm
# If it has the same name as one of the files in folder `_data/locales`, the layout language will also be changed,
# otherwise, the layout language will use the default value of 'en'.
lang: en

# Change to your timezone › http://www.timezoneconverter.com/cgi-bin/findzone/findzone
timezone: Example: Asia/Kolkata

# the avatar on sidebar, support local or CORS resources
avatar: # your image url

title: # the main title

tagline: # it will display as the sub-title

description: >- # used by seo meta and the atom feed

url: # "https://[your github username].github.io"

github:
 username: # change to your github username

social:
  # Change to your full name.
  # It will be displayed as the default author of the posts and the copyright owner in the Footer
  name: # your name
  email: # change to your email address
You can update any other fields if you like as well once you are comfortable with the structure. You can leave the baseurl field blank as this will be a static website. You are now ready to check your website locally, do that by running the following command:
Mac-mini:anupdsouza.github.io anupdsouza$ bundle exec jekyll s
If everything went fine, you will see the server address for your local website at http://127.0.0.1:4000/. Open the url in the browser & you should see your website with the details you entered in the _config.yml file. You will also notice a _site folder created by jekyll in the project structure which is basically the output of all the settings and content prepared for the Web.
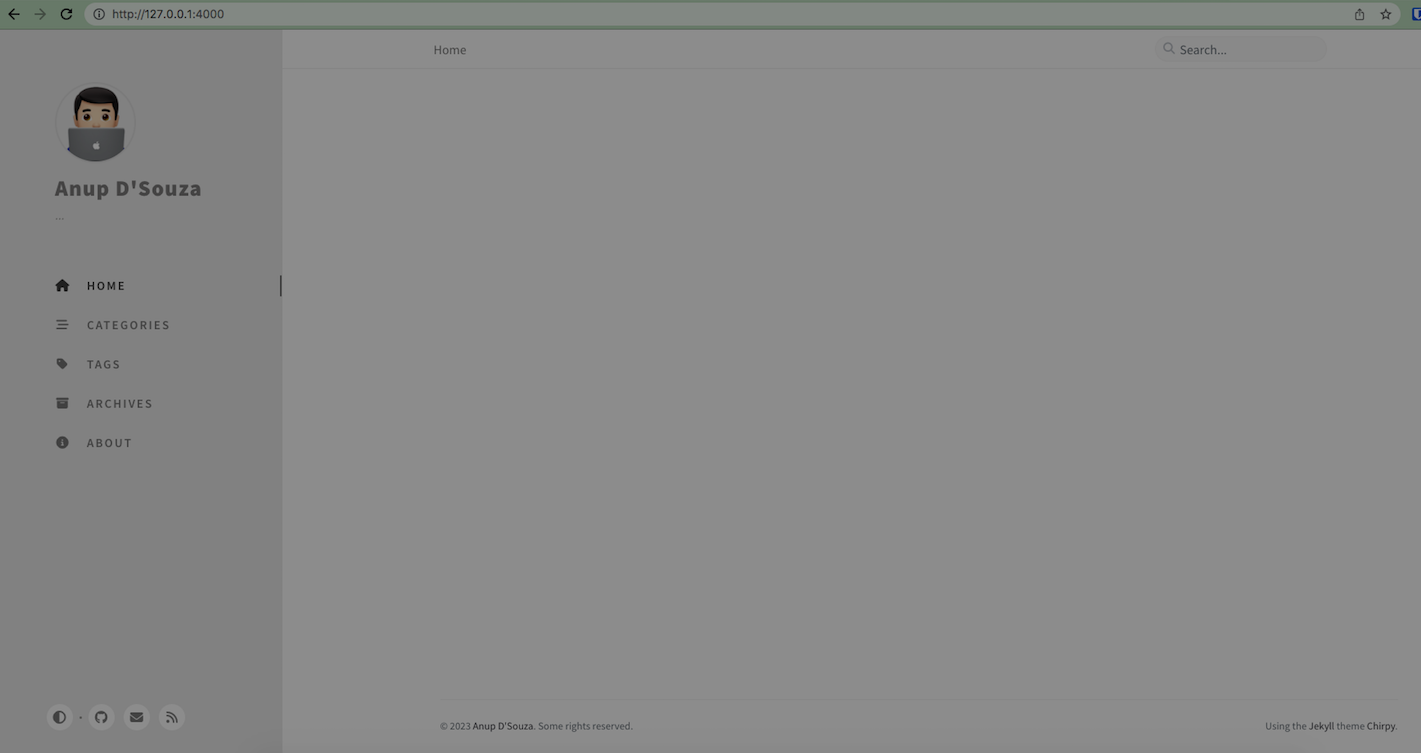 There is nothing to show on the Home page yet, we will get to that in the next section.
Updating pages & creating posts
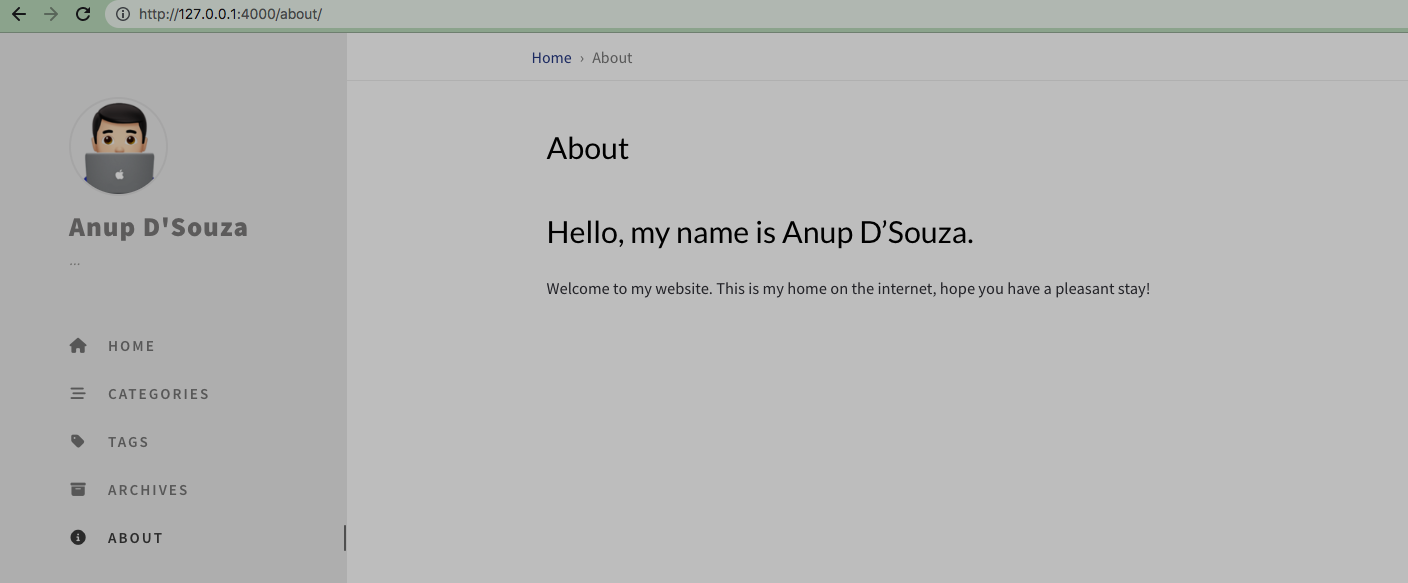
Expand the _tabs folder & open the about.md file. As you will have noticed, this is a markdown file which requires that you enter content in markdown format. Copy paste the following for the time being & update your name in the placeholder to get started:
---
# the default layout is 'page'
icon: fas fa-info-circle
order: 4
---

# Hello, my name is [your name]
Welcome to my website. This is my home on the internet, hope you have a pleasant stay!
Refresh the page in the browser & select the About section to see the new content we just entered.
 Feel free to update this page with more of your details, portfolio & accomplishments.
Creating posts with jekyll is similar to creating pages. Posts are markdown files as well with a pre-defined filename in the format
Feel free to update this page with more of your details, portfolio & accomplishments.
Creating posts with jekyll is similar to creating pages. Posts are markdown files as well with a pre-defined filename in the format YYYY-MM-DD-[post title]. Expand the _posts folder & create a new file with the following file name:
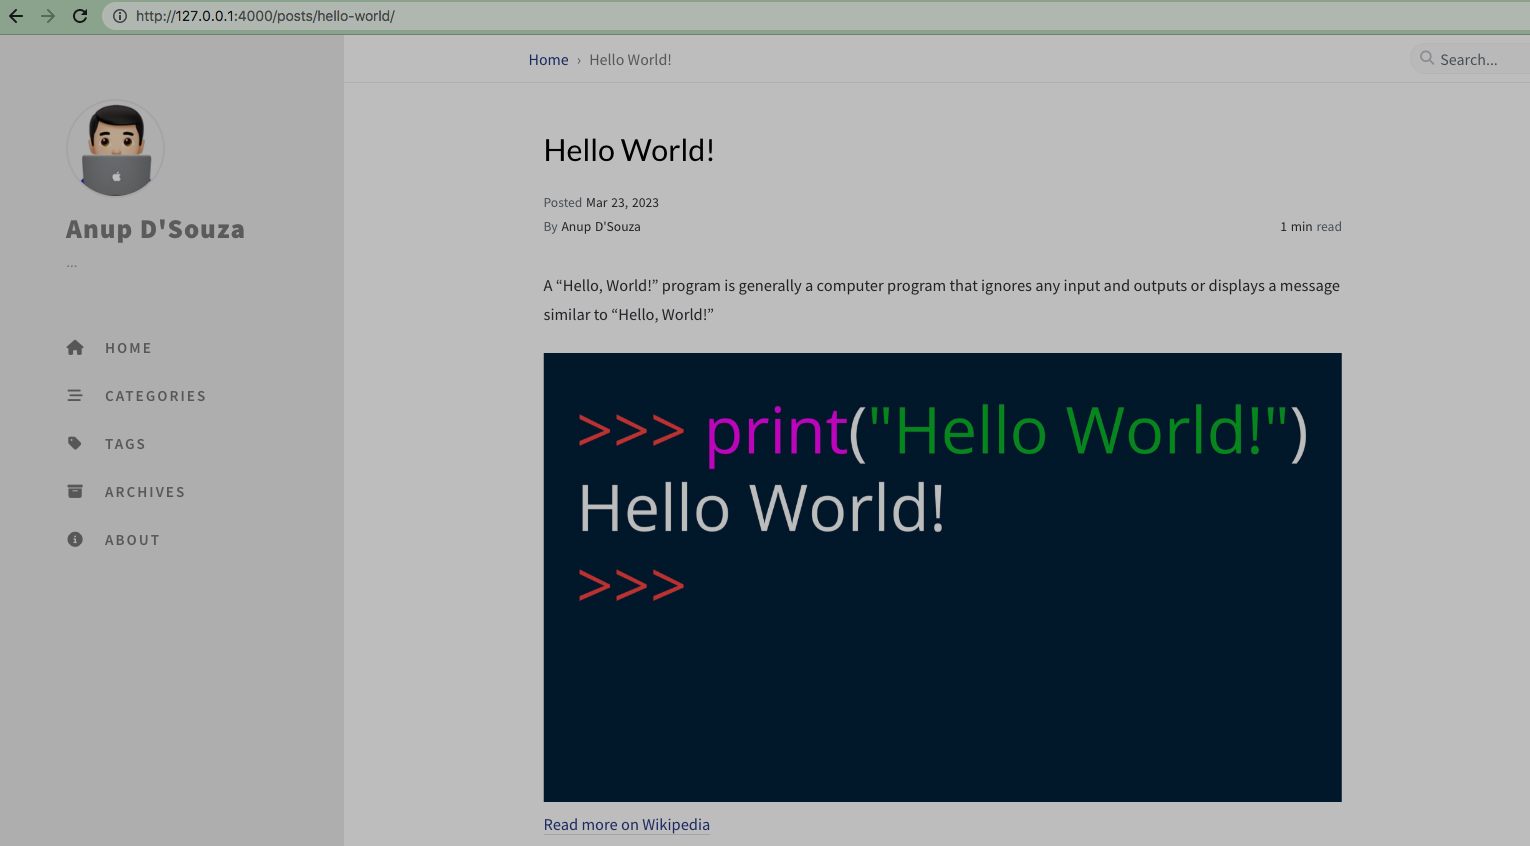
2023-03-23-hello-world.md
Open this file & paste the following content:
---
layout: post
title: "Hello World!"
---
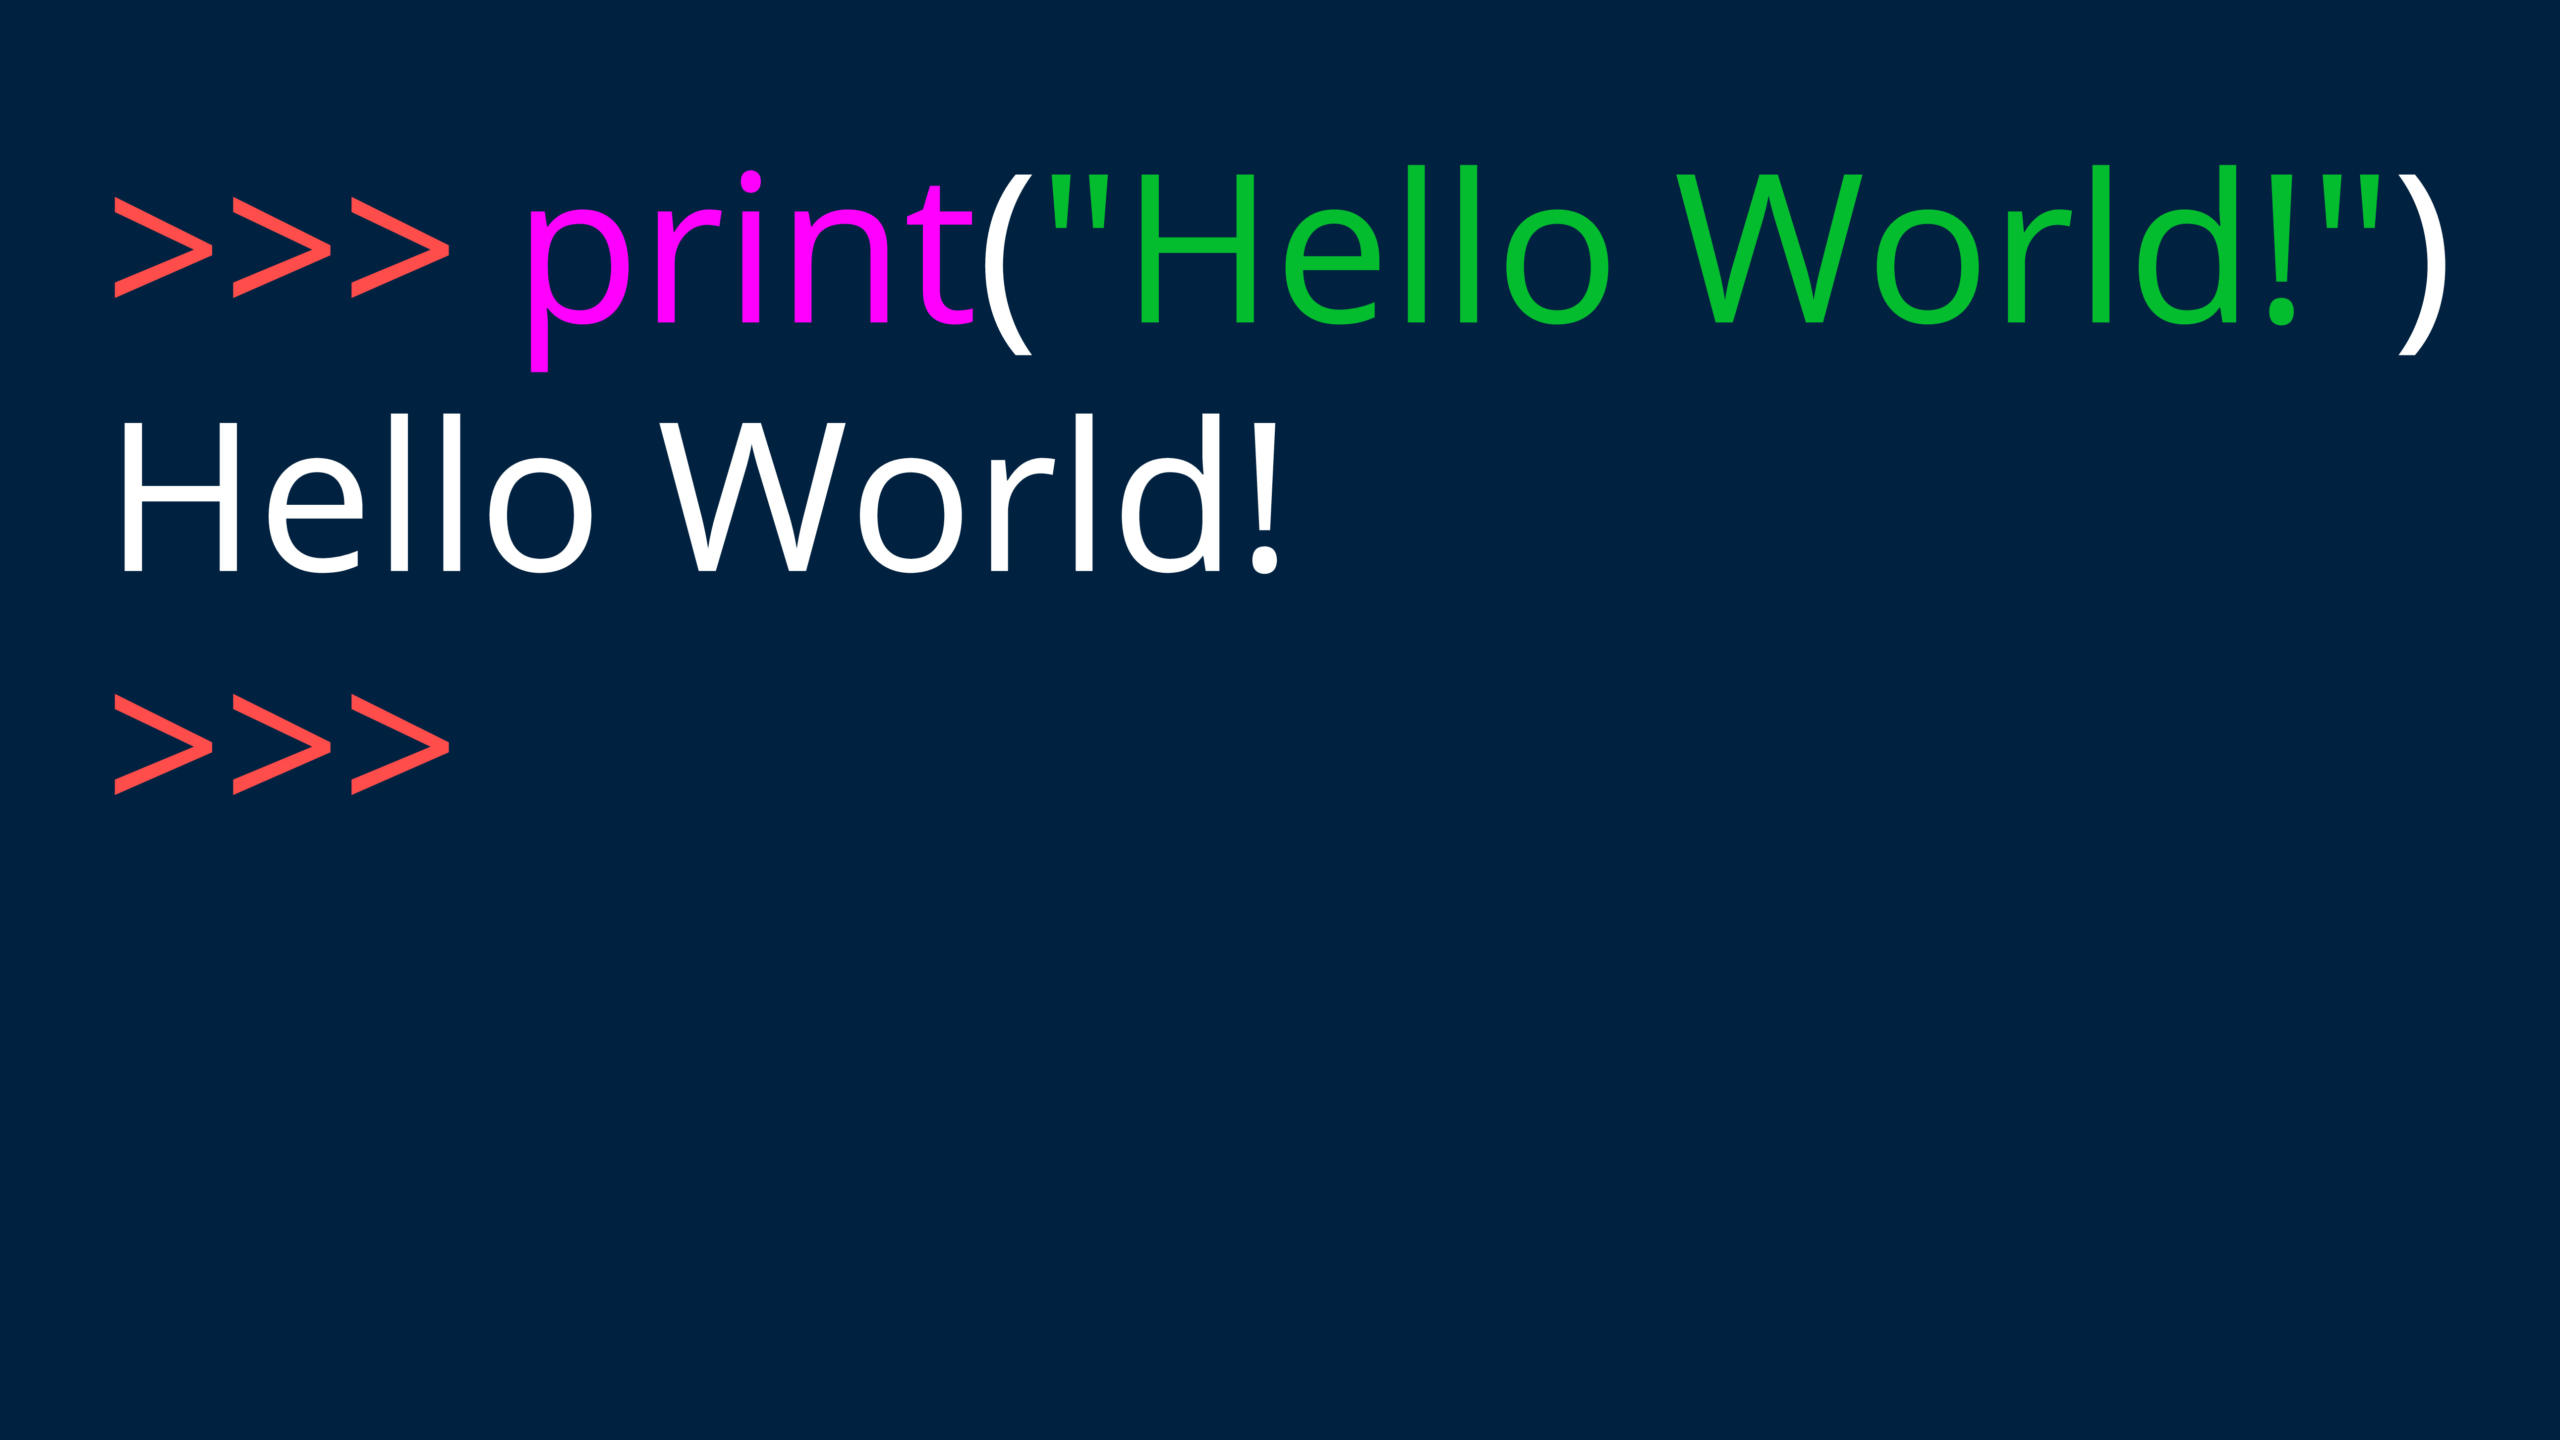
A "Hello, World!" program is generally a computer program that ignores any input and outputs or displays a message similar to "Hello, World!"
[Read more on Wikipedia](https://en.wikipedia.org/wiki/%22Hello,_World!%22_program)
Refresh your website in the browser & you should now see a brand new post on your homepage!
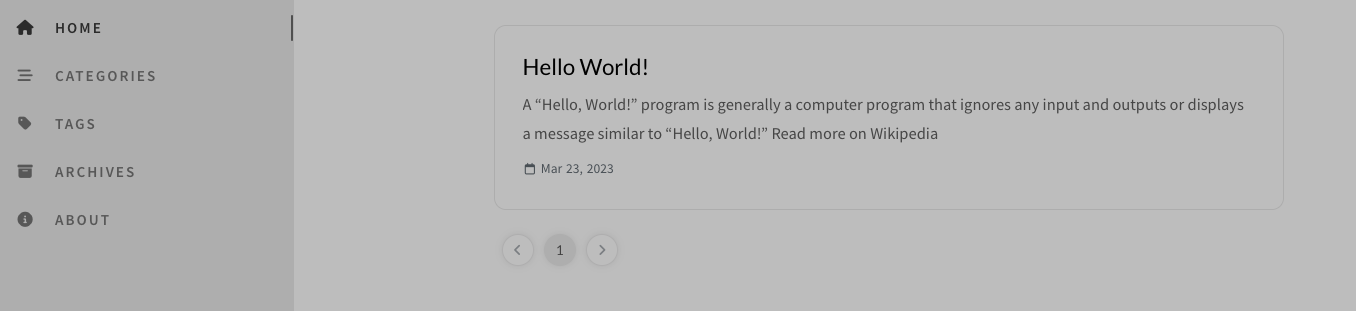 Click on the post to see it in full.
 You have now created a blog post. To create a new post, follow the same steps above & add different content to it.
Deploying your website online
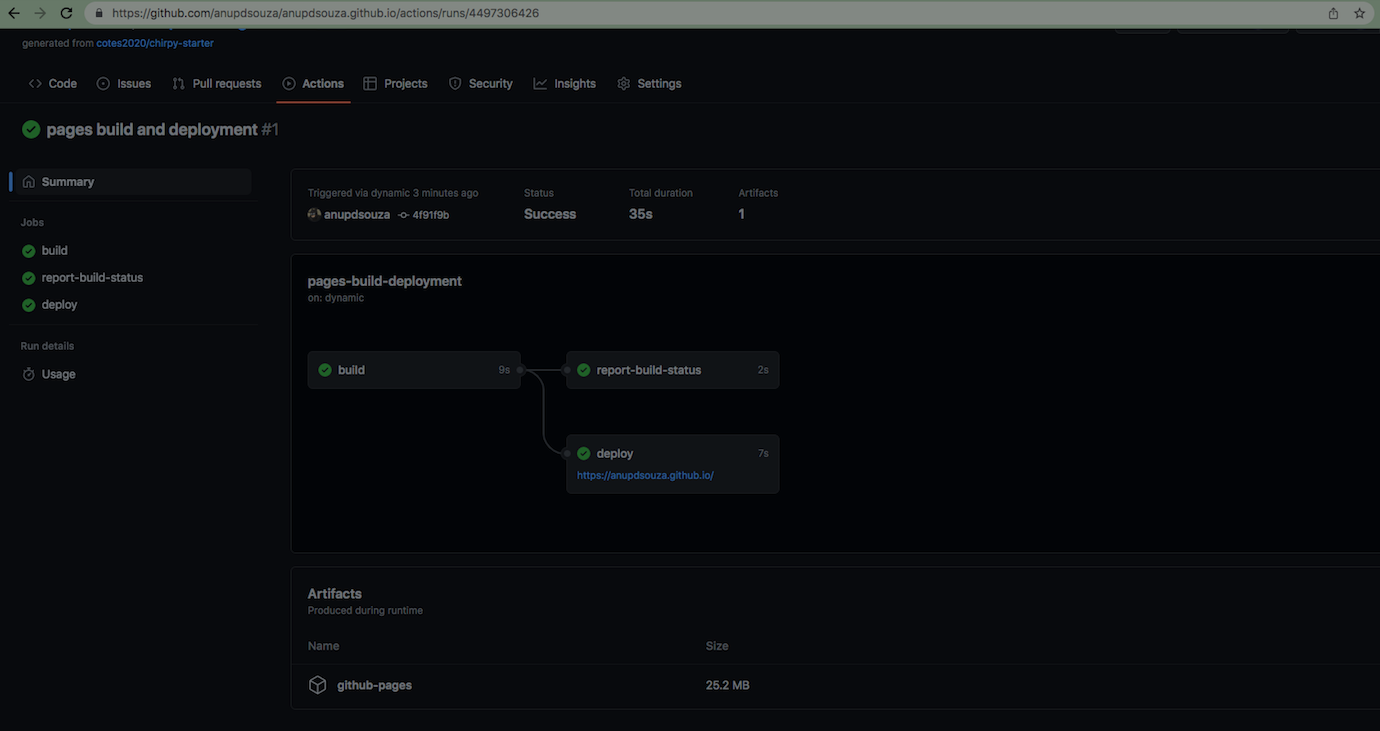
Commit your changes to your online GitHub repository. Since we selected GitHub Actions as the source for build & deployment & are using the Chirpy theme which has a deployment workflow configured (see .github/workflows folder), GitHub will automatically publish your website on every push to your GitHub repository. You can go to the Actions tab of your repository to check the status of the deployment.
 In a new browser tab, enter https://[your github username].github.io/ to view your website online.
Congratulations! You have successfully created a website for yourself using GitHub & Jekyll.
In a new browser tab, enter https://[your github username].github.io/ to view your website online.
Congratulations! You have successfully created a website for yourself using GitHub & Jekyll.
Tips
If you want to create a blog post but dont want to publish it online yet, you can create a folder at the root level with the name _drafts & add your temporary post in .md file format to it. Once you decide that you want to publish it, simply move the file from the _drafts folder to the _posts folder.
Issues & solutions
- GitHub Actions build & deployment can fail if you created your repository with visibility set to Private in GitHub. In this case you will need to go to go to Settings > General > Danger zone > Change Repository visibility > Change to Public.
- If after you have pushed your changes & deployed your website online, if you only see the following in the browser:
--- layout: home # Index page ---
Run the following commands
bundle lock --add-platform x86_64-linux
bundle install
Push a commit & GitHub Actions should now succeed & your website should render correctly.
If you want to check out the code behind this website, you can do so here. And that’s it for this post! In the next post, we will see how to host our website using a custom doman, stay tuned.
References: