Drawing the Swift logo bird in SwiftUI
Watch the video or follow along with the post below.
In this post we’ll learn how to draw the Swift logo bird in SwiftUI using Shape and Path. I decided to get the official logo than simply Googling for an image since you find so many variations online. If you go to the resources section on Apple’s developer website you’ll find a .zip package at the bottom of the page that you can download along with guidelines. The guidelines are especially important if you plan to use the logo in your application.
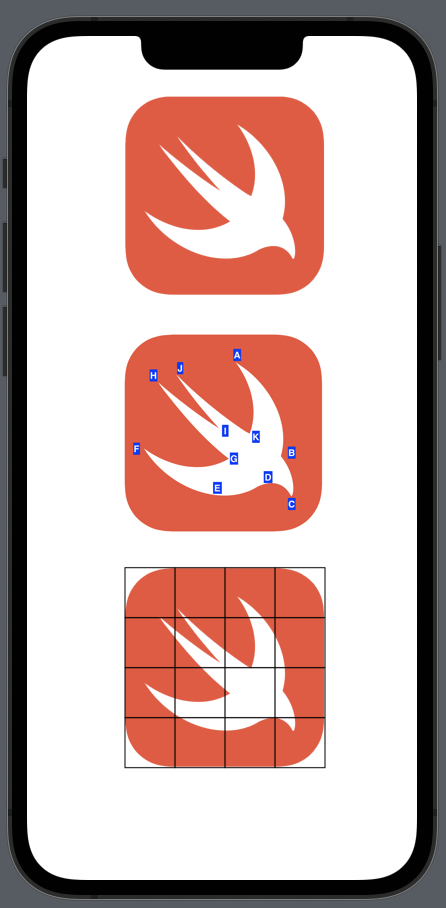
I began by creating a SwiftUI project and importing the image, then displaying it as resizable inside a 200x200pt Image view. For the next step I identified the points of interest that I’d need to draw curves from in order to draw the bird(see image below). I identified a total of 11 such points marked from A-K. Notice that I decided to break down the lower wing curve into 3 points for better handling when drawing. You could probably do it with fewer points. Now that the points were identified, I needed to get the position of the points within the 200x200pt grid. I did this by overlaying a Grid with GridRow(s) of Rectangles of 50x50pt each with a 1pt stroke border, giving me a 4x4 grid that would make it easy to approximate the positions. Note that I say approximate because the positions of the points are not entirely accurate and are only approximations since I wanted to do this quickly.

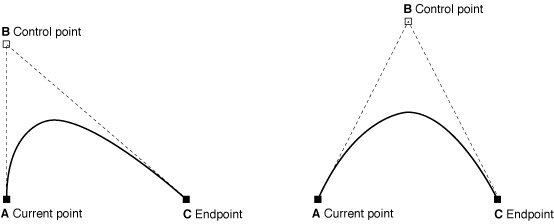
From here it defined a struct SwiftBird which would be a Shape that would make it easier to use anywhere in other SwiftUI views. Finally I implemented the required path function that returns a path of the drawing. I start by moving to point A which is the upper wing tip and then progress by adding quadratic curves with control points in a clockwise fashion with the addQuadCurve method. This adds quadratic Bezier curves between two points using a control point that allows us to control the curvature.

Think of the control point as stretching a rubber band between 2 fingers and pulling on one strand to elongate it. Notice how the shape changes when you pull the strand in different directions. Depending on how high or low you are pulling on the strand, the shape and curvature of the band changes giving you different results.
The code for the SwiftBird shape is as follows:
struct SwiftBird: Shape {
    func path(in rect: CGRect) -> Path {
        let size = min(rect.width, rect.height)
        var path = Path()

        path.move(to: CGPoint(x: 0.565, y: 0.145))
        for (ptX, ptY, controlPtX, controlPtY): (CGFloat, CGFloat, CGFloat, CGFloat) in [
            (0.79, 0.62, 0.85, 0.34),       // path A -> B
            (0.845, 0.825, 0.88, 0.75),     // path B -> C
            (0.67, 0.775, 0.78, 0.715),     // path C -> D
            (0.5, 0.82, 0.6, 0.82),         // path D -> E
            (0.1, 0.58, 0.25, 0.8),         // path E -> F
            (0.525, 0.63, 0.325, 0.735),    // path F -> G
            (0.175, 0.25, 0.305, 0.445),    // path G -> H
            (0.475, 0.475, 0.36, 0.405),    // path H -> I
            (0.26, 0.205, 0.4, 0.405),      // path I -> J
            (0.63, 0.505, 0.465, 0.405),    // path J -> K
            (0.565, 0.145, 0.7, 0.355),     // path K -> A
        ] {
            path.addQuadCurve(
                to: CGPoint(x: ptX, y: ptY),
                control: CGPoint(x: controlPtX, y: controlPtY)
            )
        }

        path.closeSubpath()
        path = path.applying(.init(scaleX: size, y: size))
        return path
    }
}
Note that the fractional values that you see are positions of the curve points (A-K) as a fraction of the width when placed in a 200x200pt container. So for example, path.move(to: CGPoint(x: 0.565, y: 0.145)) in the code above simply means move to CGPoint(x: 0.565 * 200, y: 0.145 * 200) i.e. CGPoint(x: 113, y: 29) along the canvas. This makes it easier to draw the shape given any square frame container.
Finally I add the SwiftBird shape to a SwiftUI view like so:
SwiftBird()
   .fill(Color.white)
   .frame(width: 100, height: 100)
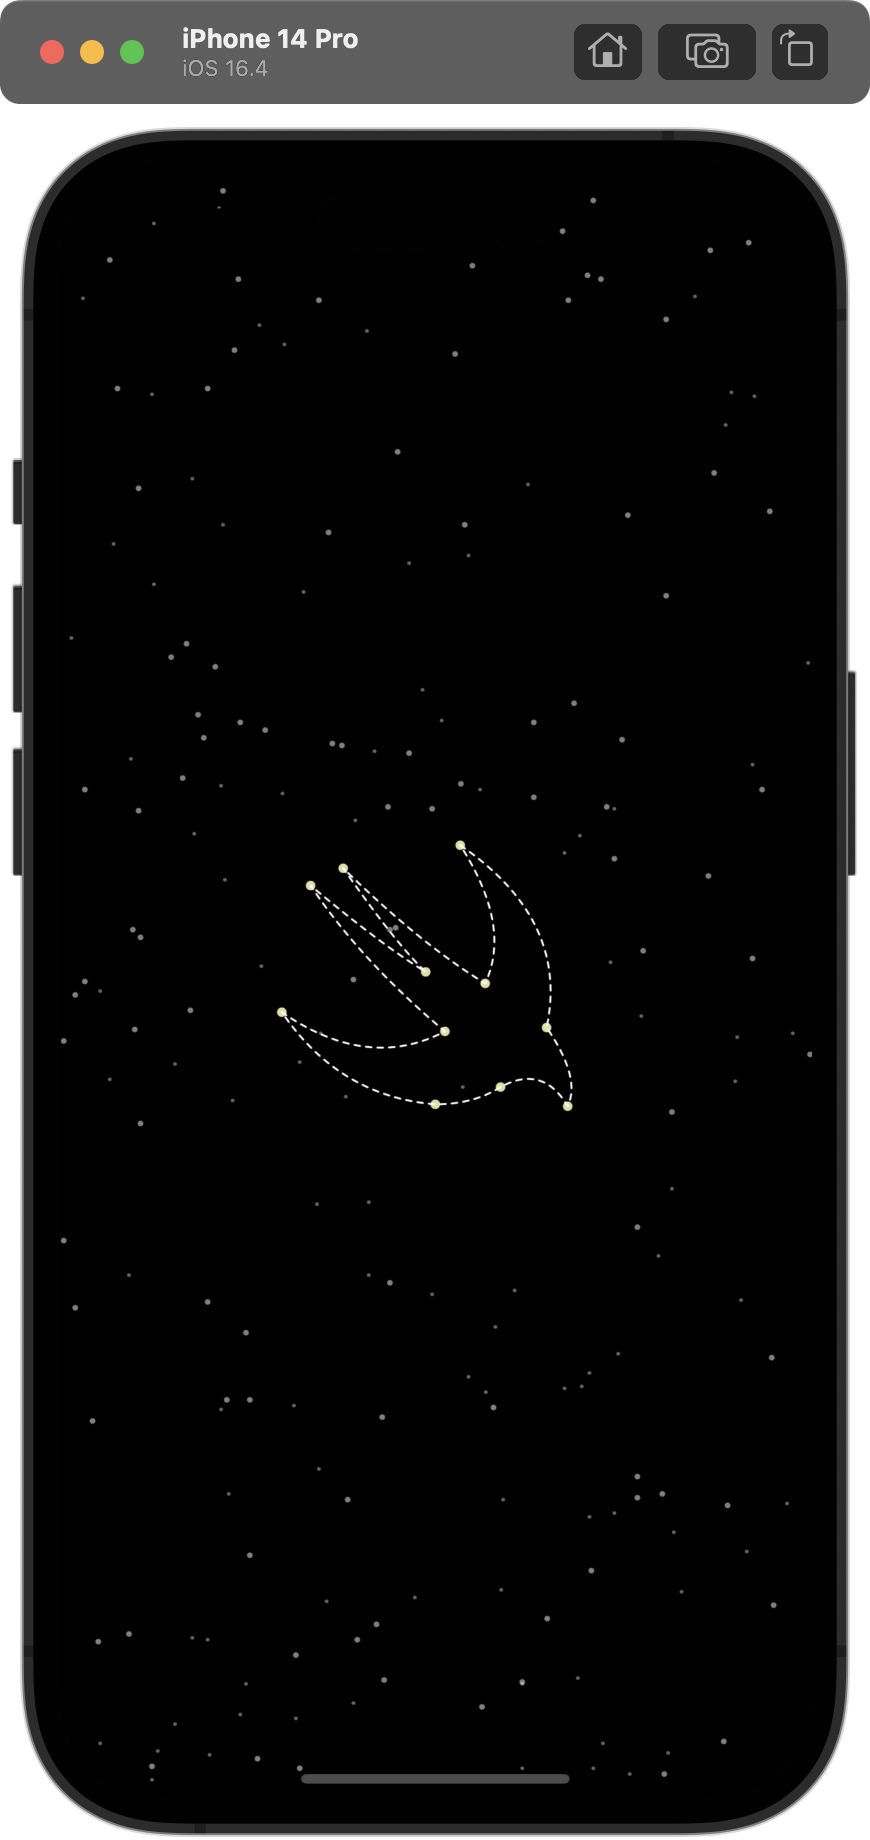
And that’s it! I’ve added some interesting effects to the shapes such as animating the paths which you can view here.The complete code can be found here. Using the stoke path I also created an animated constellation scene that you can view in my project here.

Share this article if you found it useful !
