How to get started with Gemini AI on iOS with SwiftUI
Watch the video or follow along with the post below.
So Google released the Gemini SDK for developers just a few days ago and in this post I’m going to show you how you can get started with it in just a few steps and lines of code. For the purpose of this post, we’ll be looking at text-only inputs with the Gemini Pro model. You will need Xcode 15.0 at minimum with the app target set to iOS 15/MacOS 12 or later.
Steps:
- Create a new Xcode project, Lets call it
GeminiChat😉

- Go to
File > Add Package Dependencies...and enter the following url in the search bar. This will fetch the generative-ai-swift SPM package to integrate in our Xcode project
https://github.com/google/generative-ai-swift

- Click
Add Packagein the subsequent steps to complete integration.


- To actually work with the API and in order to make requests with Gemini, you need an API KEY. So head over to Google AI Studio website:
https://makersuite.google.com/app/apikey
You might need to login here first, so do that if prompted.
- Next, click on the
Create API key in new projectoption. A new dialog will show with the generated API key, so Copy it.


- Next, back in Xcode select
File > New File > Property List. You could name the file whatever you want, I went withGenerativeAI-Info; & clickCreate

- Add a key-value pair with the name
API_KEYand the value as the String API key that you copied from step #5 above. It is recommended that you ignore this file in source control so as to not expose the api key in public.


- Next, create a new Swift file with the name
APIKeyand paste the following:enum APIKey { // Fetch the API key from `GenerativeAI-Info.plist` static var `default`: String { guard let filePath = Bundle.main.path(forResource: "GenerativeAI-Info", ofType: "plist") else { fatalError("Couldn't find file 'GenerativeAI-Info.plist'.") } let plist = NSDictionary(contentsOfFile: filePath) guard let value = plist?.object(forKey: "API_KEY") as? String else { fatalError("Couldn't find key 'API_KEY' in 'GenerativeAI-Info.plist'.") } if value.starts(with: "_") { fatalError( "Follow the instructions at https://ai.google.dev/tutorials/setup to get an API key." ) } return value } }This code looks for the api key inside the plist in order to pass it onto the generative model in the next steps. Remember to replace
GenerativeAI-Info.plistif you provided a different file name in step #6. - Switch to
ContentView.swiftand import the GoogleAI module below theimport SwiftUIstatement.import GoogleGenerativeAI - Next, we create a GenerativeModel in order to make API calls. For this example, we will be doing text-only input to the AI so set the model name as
gemini-pro.
let model = GenerativeModel(name: "gemini-pro", apiKey: APIKey.default)
- Next we’ll create
Stateproperties to store the text input to the AI model as well as to capture the AI response. We’ll provide a default welcome text to show the user when the app loads.@State var textInput = "" @State var aiResponse = "Hello! How can I help you today?" - After this we add a basic text field & button in order to allow the user to enter some input for the AI and call a method once done. The method will make a request to the AI and return a response which we will then display in the UI.
HStack {
     TextField("Enter a message", text: $textInput)
              .textFieldStyle(.roundedBorder)
              .foregroundStyle(.black)
     Button(action: sendMessage, label: {
              Image(systemName: "paperplane.fill")
     })
}
Since the response is requested asynchronously, we do it inside of a
Task
func sendMessage() {
     aiResponse = ""

     Task {
            do {
                let response = try await model.generateContent(textInput)

                guard let text = response.text else  {
                    textInput = "Sorry, I could not process that.\nPlease try again."
                    return
                }

                textInput = ""
                aiResponse = text

            } catch {
                aiResponse = "Something went wrong!\n\(error.localizedDescription)"
            }
        }
    }
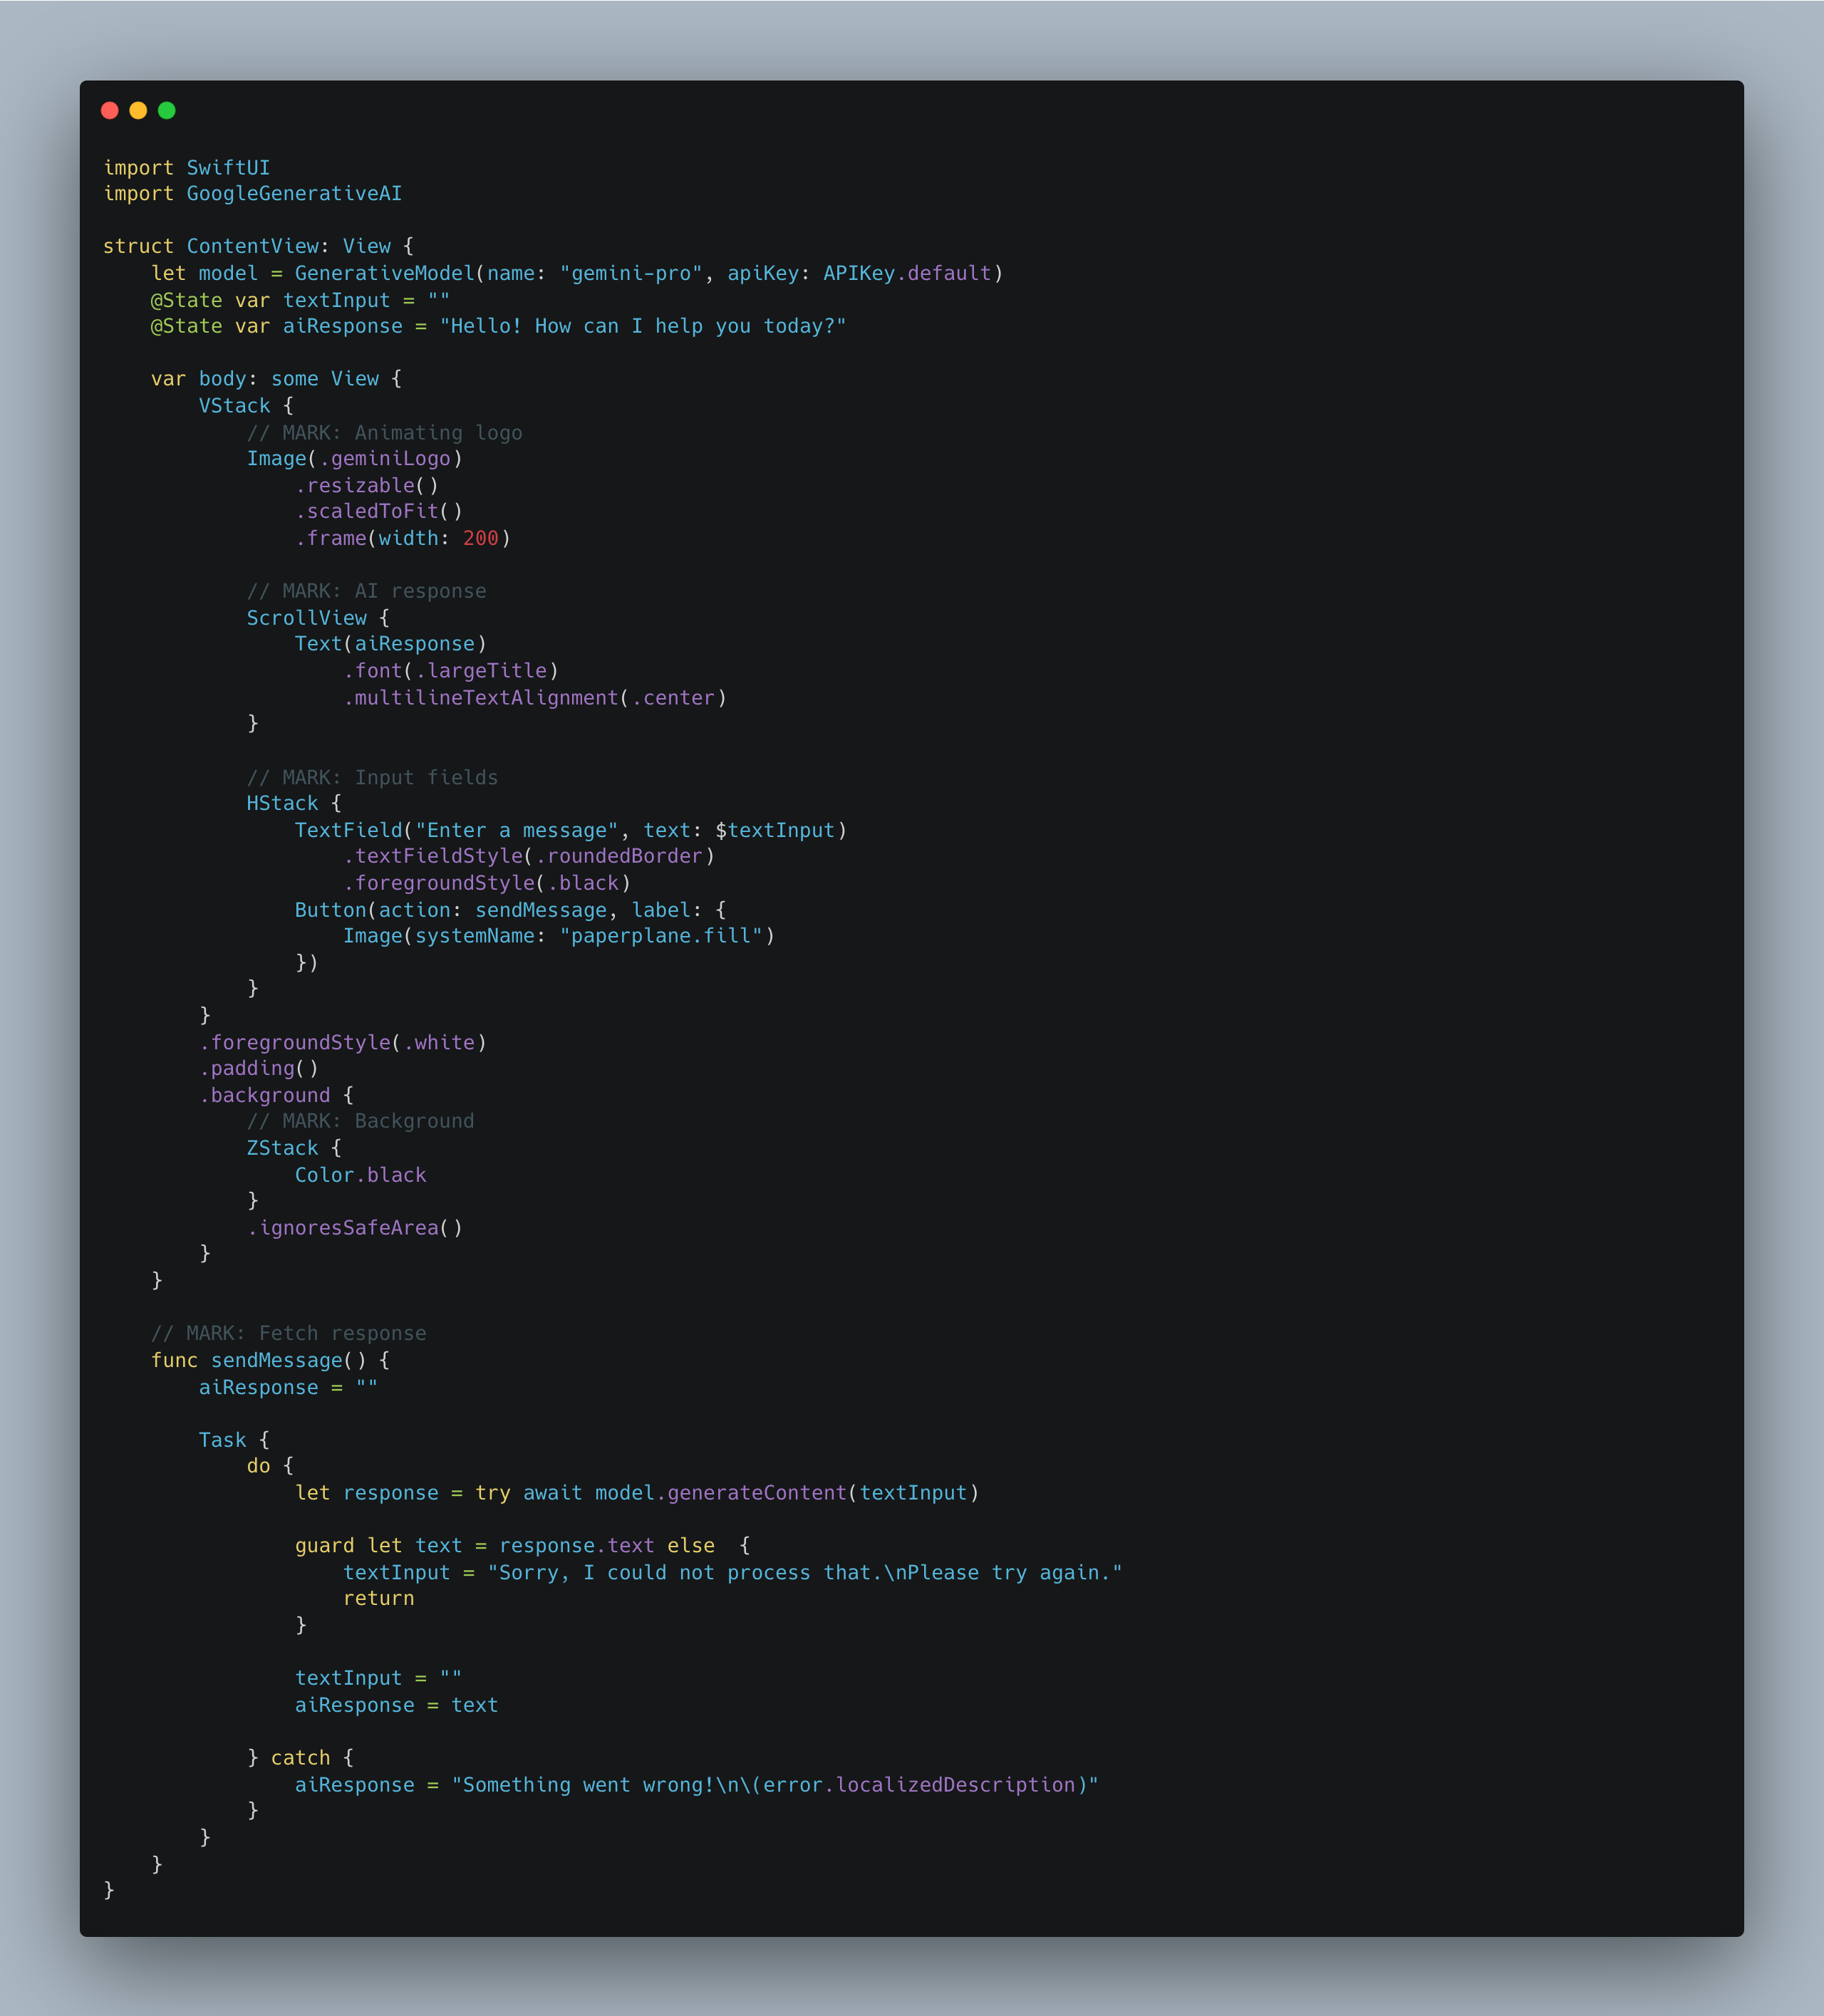
- The complete code looks like this:

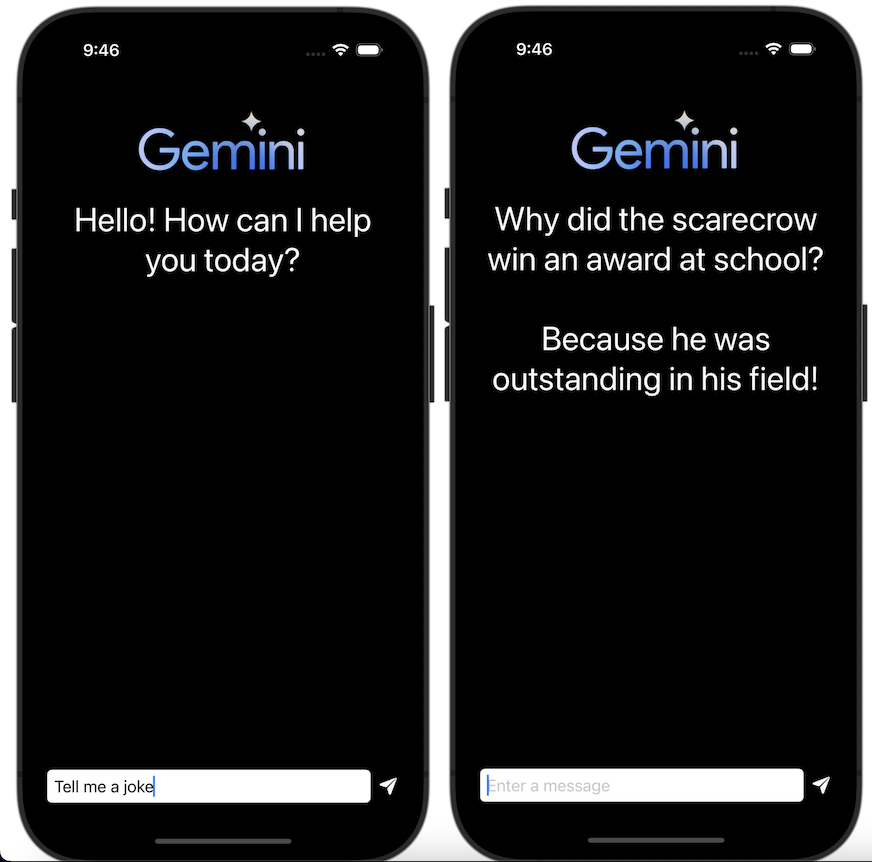
- Finally, enter some input for the AI and wait for the response.

And that’s it! The complete code can be found here. This post has only scratched the surface of what you can do with Google’s latest AI offering. To go in depth such as using multimodal models that take both text and images as input, check out the documentation.
Leave a comment if you have any questions and share this article if you found it useful !
